 ワタタク
ワタタク今回の記事の目的はProcessingの「PGraphics.clear()」を理解し、自分なりに使ってみること。
この記事を書いた人


上達の研究家 / アーティスト
「才能」ではなく「発見」で描く。文系・36歳からの上達ハック。
- ゼロから独学でクリエイティブコーディングに挑戦し、以下の実績を達成
- 開始1年8ヶ月目までに公募6つに挑戦し、3つ入選(勝率50%)
- KITTE大阪の18メートルあるAxCROSS大型スクリーン
- 虎ノ門ヒルズステーションタワーB2F TOKYO NODE エントランスサイネージで展示
- UN:O(東京大手町)にある会員限定のサテライトオフィスにて2作品常設展示
- 開始1年9ヶ月目に、虎ノ門ヒルズ49階、地上250mのインフィニティプールへ作品提供・展示
- 開始1年8ヶ月目までに公募6つに挑戦し、3つ入選(勝率50%)
- 【上達の秘密】
- 起源の物語:未経験から虎ノ門ヒルズ展示までの全記録(Genesis)
- 思考の技術:「上達」をシステム化する、モレスキン6冊の運用設計図
- ※虎ノ門ヒルズでの実績を出した「思考」と「経験」を、再現可能な形に体系化
目次
【Processing】PGraphics.clear()について
PGraphics.clear()について
- 英語の「PGraphics.clear」は「グラフィックスをクリアする」という意味
PGraphics.clear()は、画面を全部透明にして新しくするためのもの
【Processing】PGraphics.clear()の使い方【画像とコード】


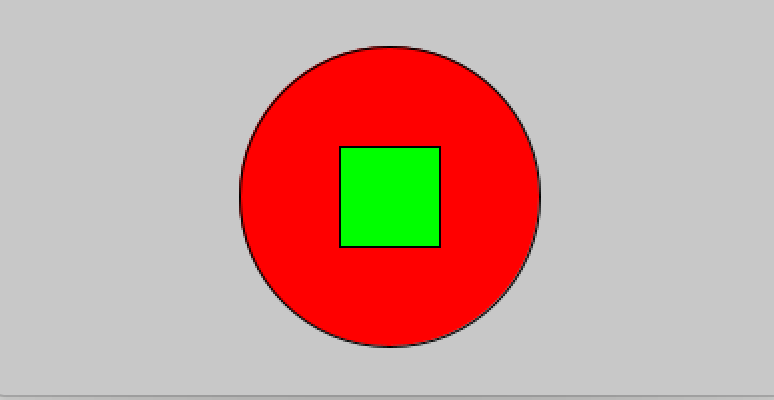
このコードでは、毎フレームで pg.clear() を使ってキャンバスを透明にリセットし、その後に赤色の円と緑色の四角を描いています。そのため、常に最新の描画内容だけが表示され、前のフレームで描かれた図形は表示されません。
PGraphics pg;

void setup() {
  size(400, 200);  // メインキャンバスのサイズを指定(幅400、高さ200)
  pg = createGraphics(200, 200); // PGraphicsを初期化(サイズ200x200)
}

void draw() {
  background(200); // メインキャンバスの背景色をグレーに設定

  // PGraphicsに描画を開始
  pg.beginDraw();
  pg.clear(); // お絵かき用の紙をきれいにする(透明にする)

  // 赤色の円を描く
  pg.fill(255, 0, 0);
  pg.ellipse(100, 100, 150, 150);

  // 緑色の四角を描く
  pg.fill(0, 255, 0);
  pg.rect(75, 75, 50, 50);

  pg.endDraw();

  // メインキャンバスにPGraphicsを表示
  image(pg, 100, 0); // PGraphicsをメインキャンバスに表示(位置: 100, 0)
}
【Processing】PGraphics.clear()を使ってみた感想
PGraphicsを使って、図形などを重ねたいなと思ったときに使います。


それでは今日もレッツワクワクコーディング。

